
So. Japanese Milk Bread. Yes, I made it. And I made it Eggless. And I also made it 100% whole wheat. Yes. YES, I DID.
This journey has been infuriating, very slow, frustrating, saddening yet, very very very worth it. I almost cried when my loaf rose in the oven. Not kidding at all.
If you want your bread to turn out perfectly, I highly recommend reading this entire post. Believe me, it is better than working very hard to prepare your bread and fail just because you didn’t know what to look for.
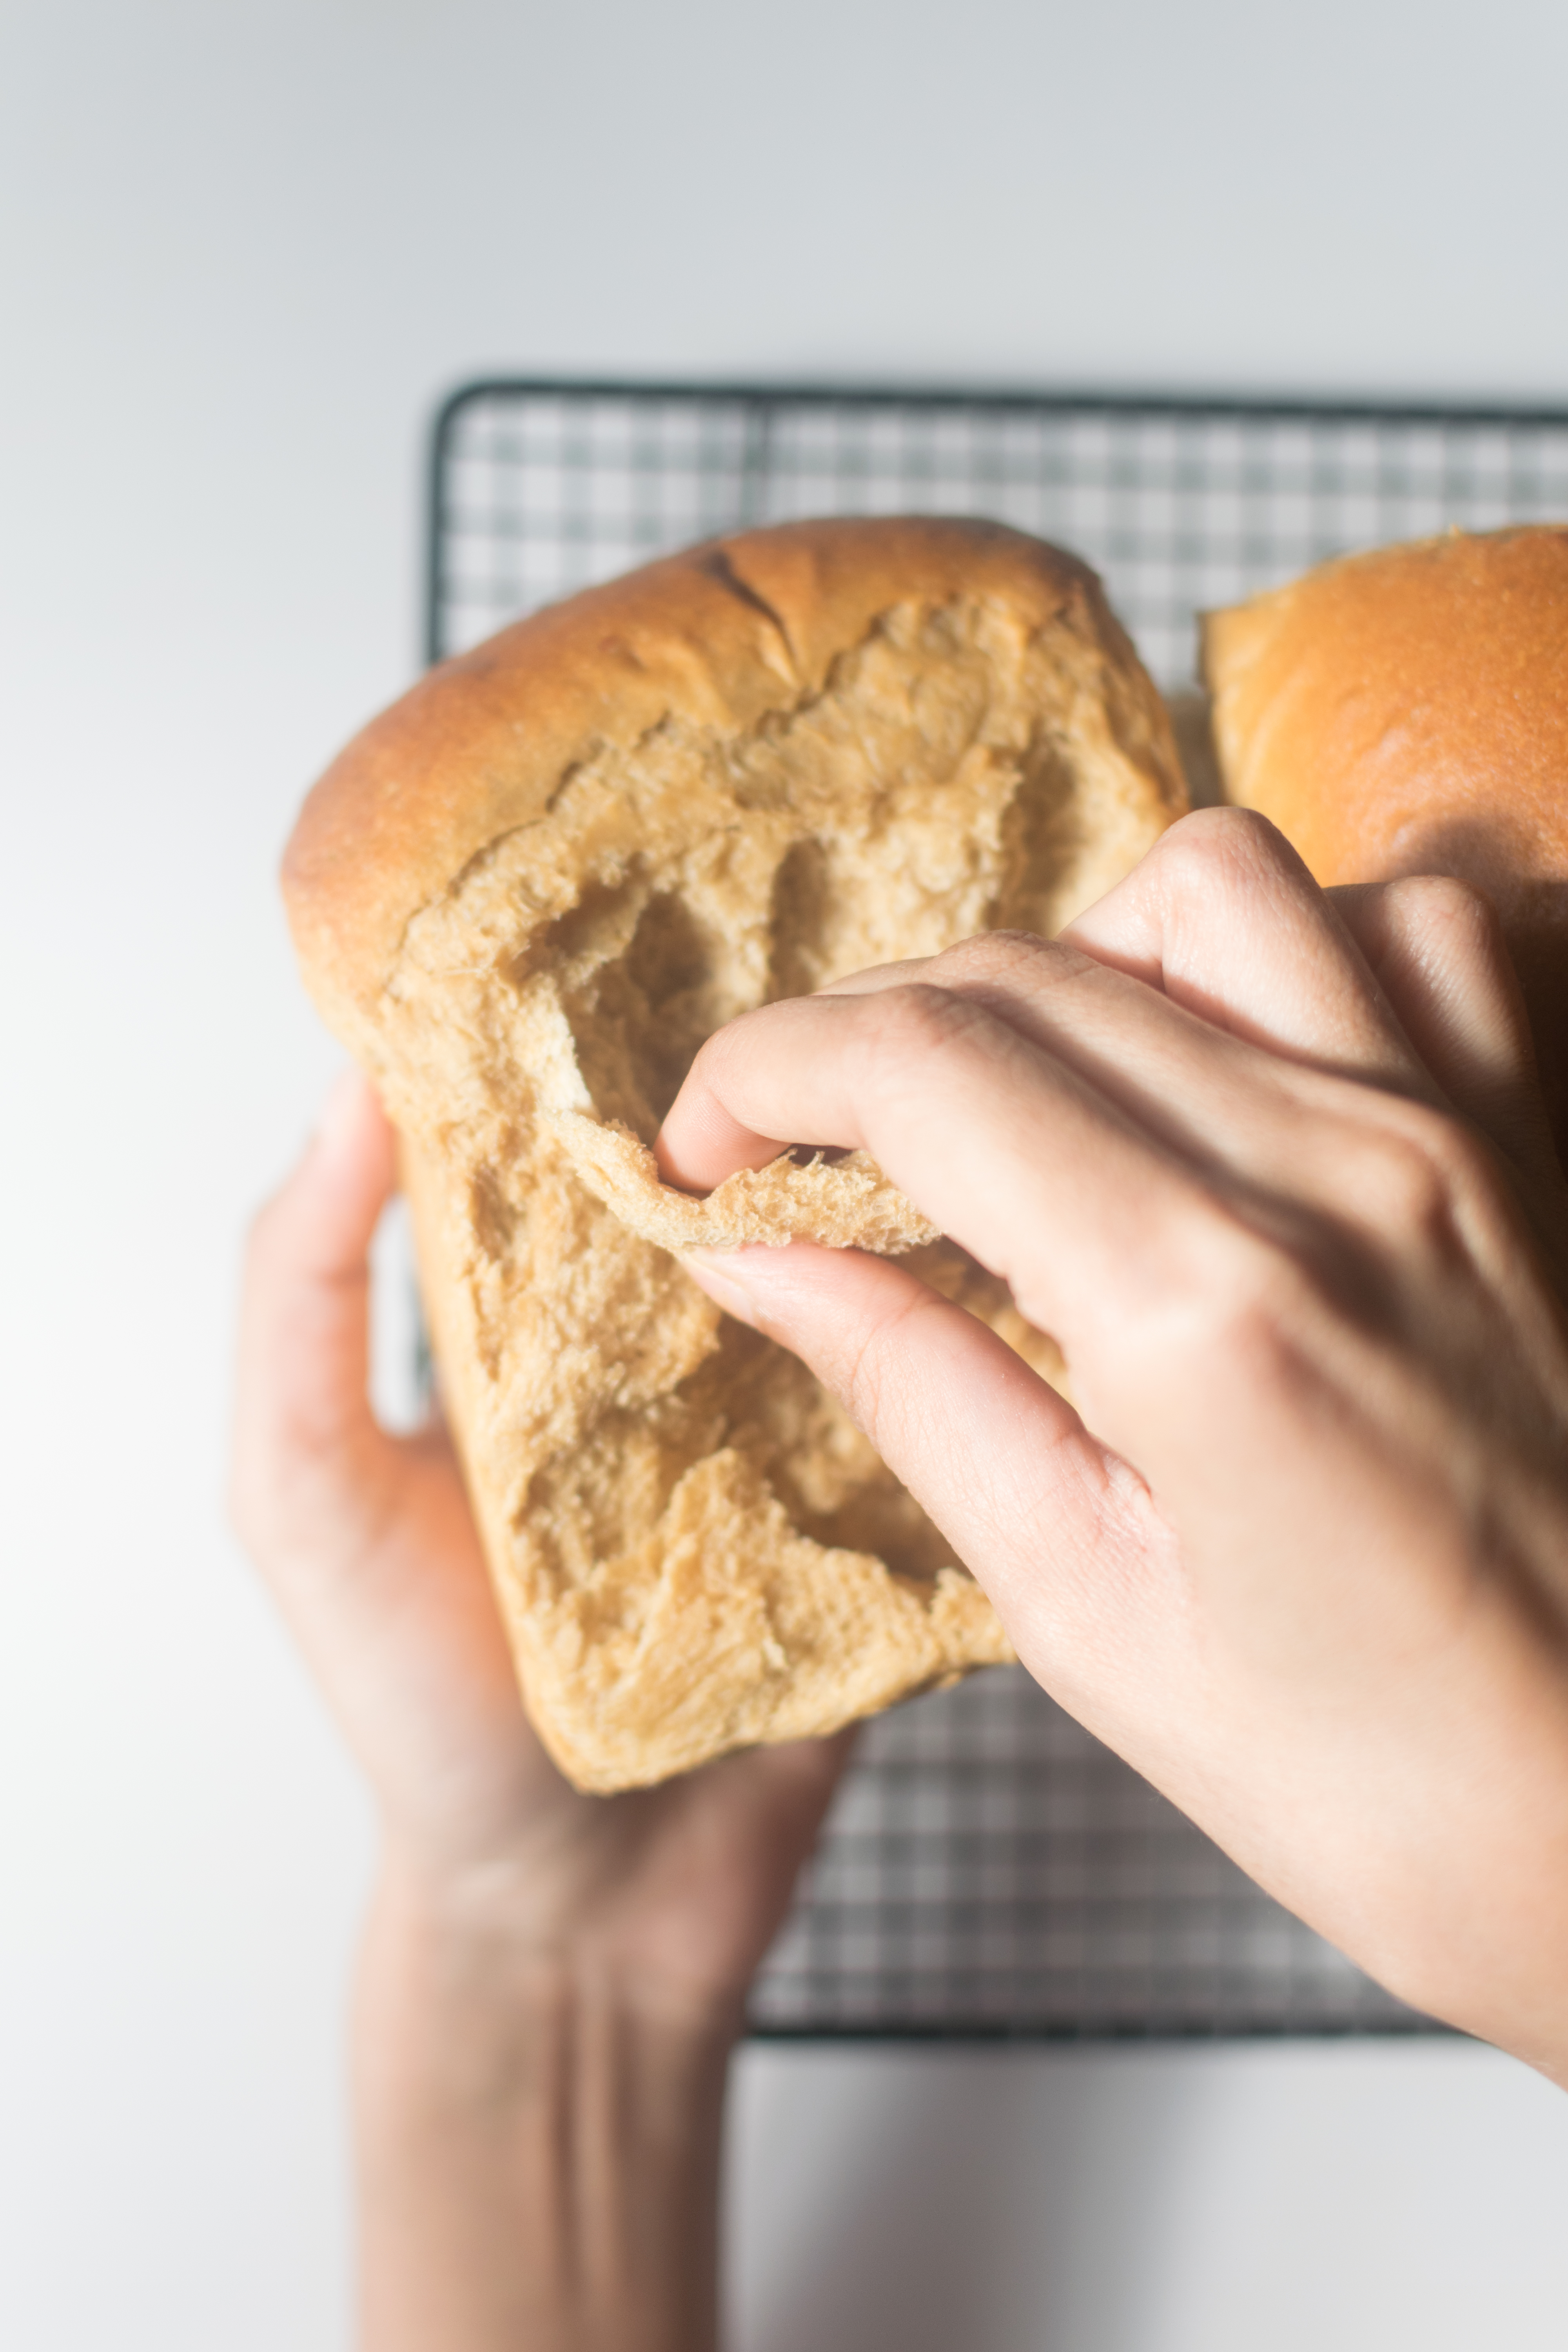
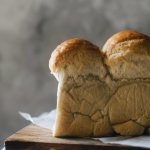
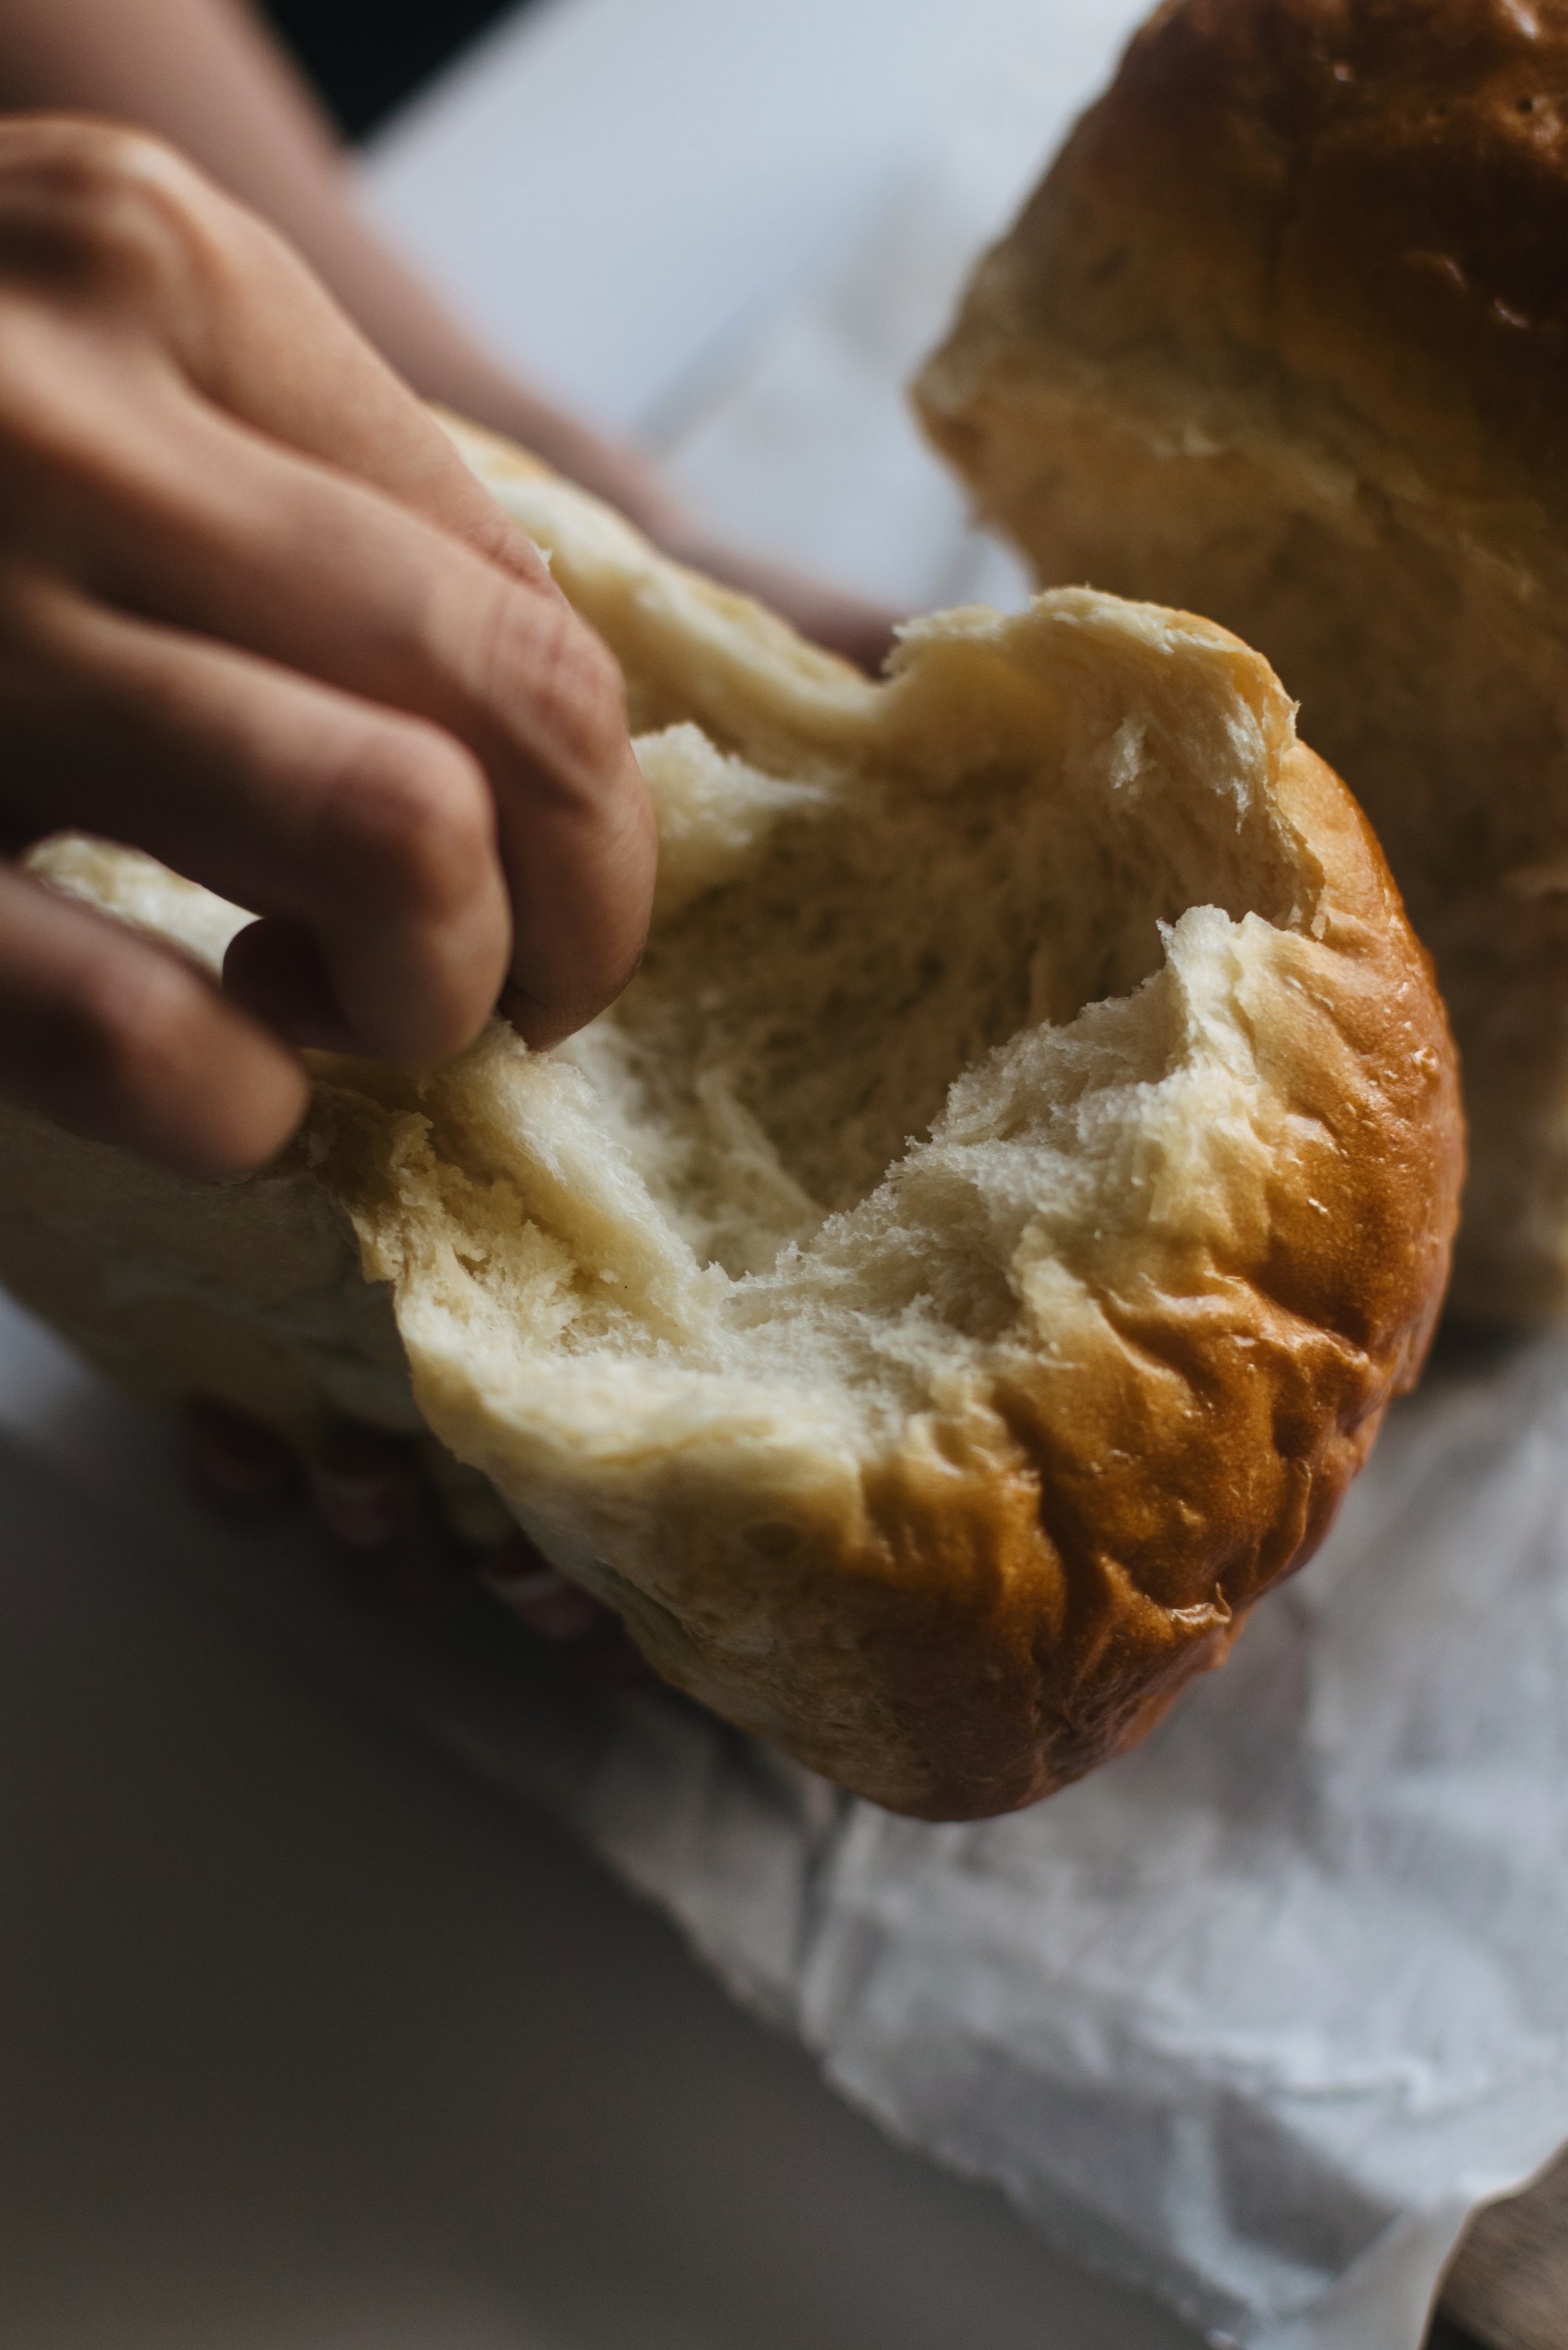
So, if you’re familiar with the Japanese Milk Bread, you da MVP. If you’re not, well let me tell you! It is one of the fluffiest, softest, clouds of bread you’ll ever have. My favourite thing about this bread is pulling it apart. If you’ve ever done that, you’ll know why, and if you haven’t… Make this recipe, try it and you’ll know why. So, this bread if you look up on the internet has many recipes. Almost all of them have eggs. I have been trying to make it for the past year, however I only succeeded last week. I have made this recipe both by hand and with the help of a stand mixer. If I am being honest, it is way easier to make this on a stand mixer, but it is definitely possible to make it by hand. I did give up after a while because 20 minutes of kneading takes a toll on my arms, but if that’s something that you can do, then go ahead. I promise you; it definitely is worth it. I love kneading bread by hand and I have made bread by hand, the results are perfect, it just requires a little more effort.
There are certain things that I really, really need to address when you make this recipe. This may sound hard but just hear me out. Bread making is really easy if you know what to look out for. You can’t just randomly add flour and water to achieve a certain consistency. I have done that, because I thought it didn’t matter. Turns out, it does. Over my months of experiments, I came across this term called baker’s percentage. If you want to read more about it, I’ll put some links here that would explain the term better.
https://www.kingarthurflour.com/pro/reference/bakers-percentage
Here I’m going to try and keep it short and simple, just pertaining to this bread. So, a baker’s percentage is different how? So, every recipe has different amounts of ingredients. If you have ever come across the term 70% hydration for a loaf of bread, then it means that the amount of water used in the recipe is 70% of the weight of flour. Confused? Let me make it easier.
For example: if in this bread recipe if I use a total of 100g of flour, that’s my 100%. All the other ingredients would be calculated against it. So, a 70% hydration would mean. 70 g of water.
Did that make sense?
I hope it did. If it didn’t, read it once again, out loud. Trust me you’ll get it. Took me a while too.
Basically, what I am trying to say is that, you need to work in terms of baker’s percentage when it comes to this bread at least.
Next, every loaf pan has a certain amount of dough it can handle. Now how would I know that Anjali? I knew you’d ask. So, from what I have read this is how you calculate that:
-take your loaf pan, fill it with water to the top.
-measure the amount of water your pan can hold
-divide it by 1.97 (This is the figure I derived for making my recipe. So if you use this formula you can do this calculation to understand quantities of ingredients according to your pan size. Basically scaling my recipe to fit your bread pan.)
Example: if my loaf pan can hold 1600 ml of water so my loaf pan can hold a dough that weighs 812 g
Now, 812 is going to be your guide, hence all the other ingredients will be measured according to this value.
I can understand if all this sounds overwhelming or confusing, but it is easy. Trust me. Just read it out slowly once, you’ll get it.
I will list out the ingredients and their percentages alongside them so that you can calculate your required amount of ingredients no matter how big or small your loaf pan is.
Before I get into the recipe, one more thing needs to be remembered. Kindly be patient with your dough. If you have the urge to add more flour/water, try to resist the urge and knead for a few minutes more to see if the dough really needs that addition. It’s likely that it won’t. And a very useful tip I have heard, more hydration equals a lighter loaf.
The fermentation time for the dough is very important. I used to think I could eyeball it, but hear me out. For a 25-28°C temperature the time for the dough to ferment is approximately 1 hour. If the temperature increases the time will reduce. Hence you need to keep an eye. The best way to check if you have proofed your dough enough is by gently poking your dough. If it slightly springs back, it means the dough is ready. If it deflates, then you have over fermented your dough.
Similarly, if you want to know if you have kneaded your dough enough, there is a test called the Windowpane test. This is extremely crucial for your bread. How to do this?
Take a generous piece of your dough (about 70 g) stretch it with your hands, from all four edges. When you can easily stretch your dough so that it’s almost like a translucent windowpane and your dough doesn’t tear. That means your dough has been kneaded enough. Here’s a link to read about this in detail.
https://www.thekitchn.com/bakers-techniques-how-to-do-th-70784
IMPORTANT FOR THE WHOLE WHEAT VERSION:
Whole wheat flour is quite different compared to refined all-purpose flour. It contains germ and bran and endosperm. The white all-purpose flour is mostly the endosperm, which is favourable when it comes to Gluten formation. Gluten gives strength to the bread. However, when it comes to whole wheat flour, the bran and the germ are like blades that cut off the gluten strands. Hence, the bread that use whole wheat flour lack structure, thereby being dense.
How do we fix this problem?
The best way that I have found to fix this problem is by using ‘Vital Wheat Gluten’ it is a product that has changed my life. This post is NOT SPONSORED by any brand or company. This has just been my discovery over my months of experiments. Vital Wheat Gluten is the protein that enhances the bread, helps develop more, stronger gluten strands.
If you don’t have bread flour, you can add between 15-25 grams of Vital Wheat Gluten for every 100-120 grams of all purpose or wheat flour to enhance its gluten forming capabilities.
I have used Vital Wheat Gluten for both my white bread version and whole wheat version. It really is a life changing ingredient and I will advise that you do not skip it if you make especially the 100% whole wheat version of this bread. It is quite an inexpensive ingredient and has a very long shelf life, definitely worth spending. If you skip this, then your bread will seriously fail.
Some other things to keep in mind for the whole wheat bread:
I hydrate my Whole Wheat flour and let it rest overnight in the fridge because it helps soften the flour thereby making it gentle on the gluten strands.
The whole wheat flour needs more water as compared to the white flour, so do not worry your dough won’t be wet.
The dough ferments faster because the yeast has a lot of nutrients to feed on.
You can buy all the things I have used, here:
Eggless Japanese Milk Bread (All-purpose flour version)
Fluffy, easy and super delicious eggless Japanese milk bread or Hokkaido bread is here!
Total dough weighs roughly 812 g
Tangzhong:
- 28 g All-purpose flour ((7%))
- 128 g Water ((32%))
Bread:
- 372 g Flour (340 all-purpose flour + 32 g Vital wheat gluten) ((93%))
- 36 g Sugar ((9%))
- 8 g Salt ((2%))
- 8 g Yeast (active dry) ((2%))
- 168 g Milk ((42%))
- 32 g Condensed milk ((8%))
- 32 g Unsalted butter ((8%))
The day before
- Make the tangzhong:
- In a heavy bottom saucepan, take 26g all-purpose flour and 132 g water, mix till there are no lumps.
- Put on medium heat and whisk constantly for 2-3 minutes till the mixture is almost bubbling and very thick and stretchy.
- Place in a heat safe container and refrigerate overnight or at least 6 hours.
Make the bread:
- In a large bowl (if using a stand mixer, use the bowl of your stand mixeadd the room temperature milk, sugar and yeast. Let it sit for 5 minutes till the mixture is foamy and smells like yeast.
- Add the flour, vital wheat gluten and tangzhong (I used it cold because the temperature in my kitchen was 36°C)
- Start kneading on a low speed. If by hand, gently start incorporating the dough. Knead for 2-4 minutes till a dough ball forms.
- Only once this happens add the salt. Knead again for 2-4 minutes.
- Now add the condensed milk and room temperature butter (I purposely used colder butter to balance the heat of my kitchen)
- Keep kneading till your dough is elastic. Check your dough’s strength by doing the window pane test. (If you have read the entire post you will know what this is, if not kindly read the entire post)
- Once the dough passes the windowpane test. Roll it into a smooth ball and place it in a slightly greased bowl to ferment. It took my dough approximately 40 minutes to ferment perfectly (to know how to determine if you have proofed your dough enough please read the entire blog post above.)
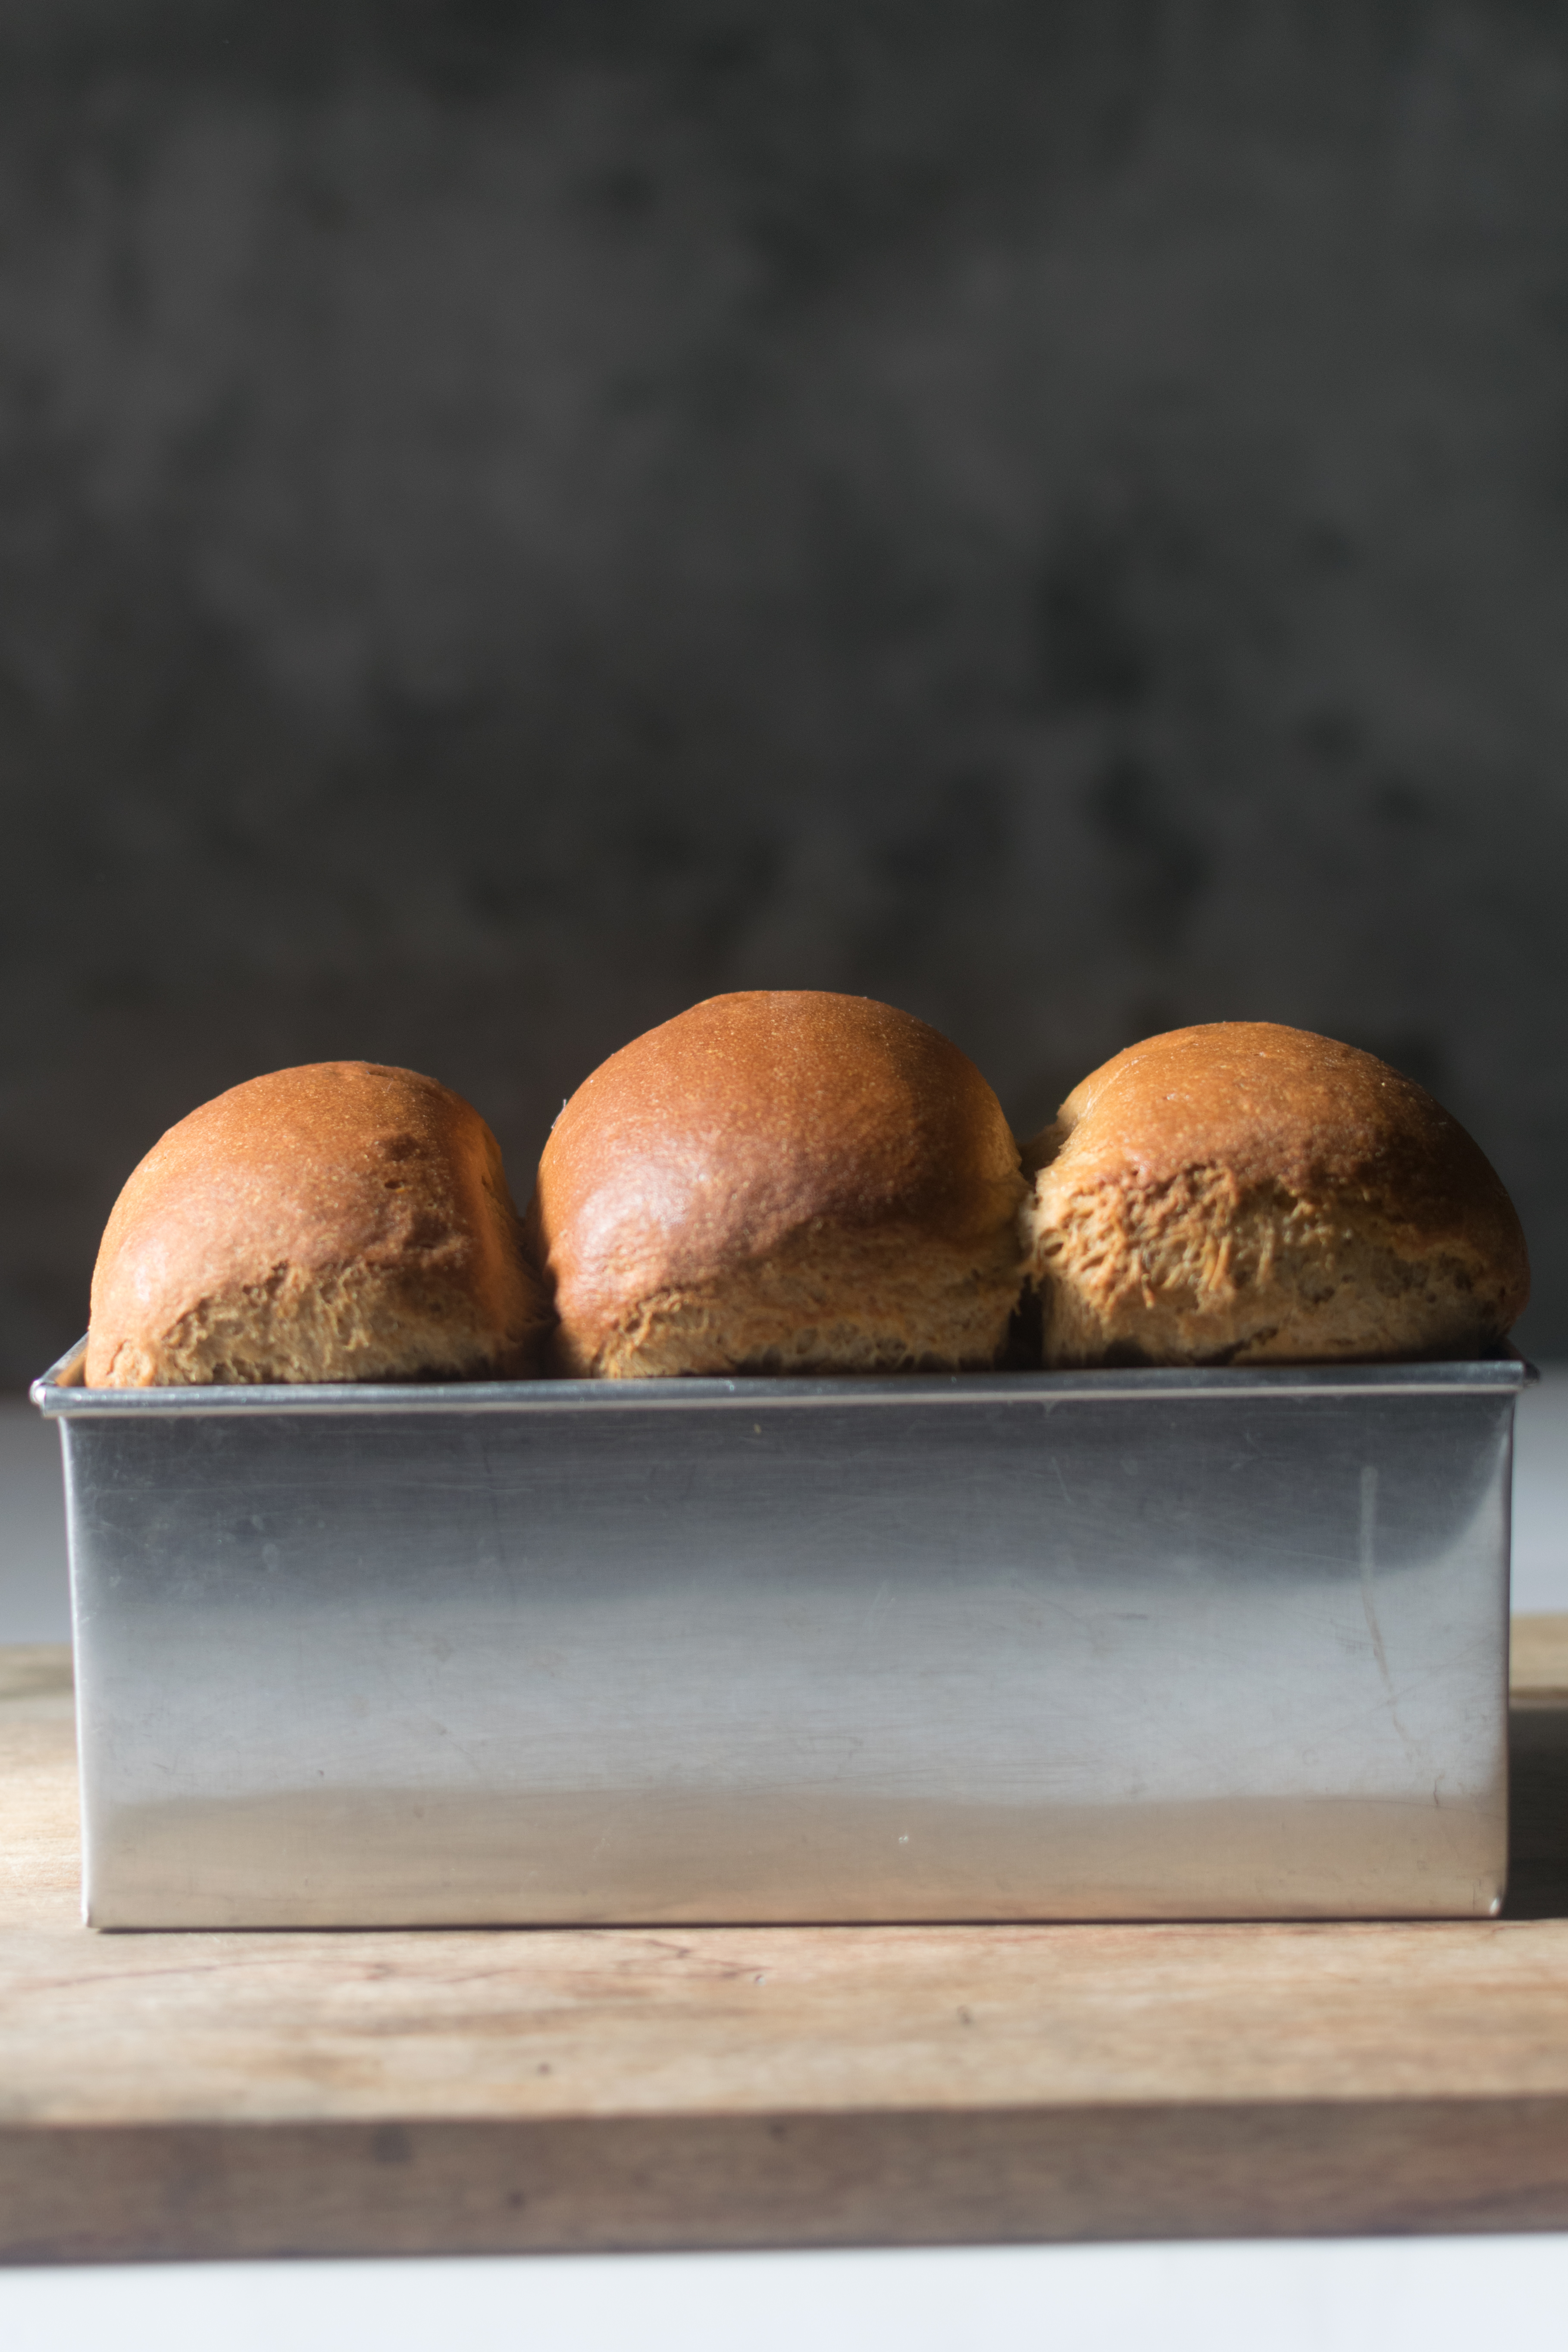
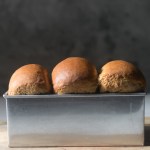
- Once proofed. Prepare your loaf pan. I line my pan with parchment paper. Take your dough and divide into three equal pieces.
- Roll each of these pieces into smooth balls, place them on a clean surface and let them rest for 10 minutes. Cover them with a damp tea towel so that they don’t dry out.
- After ten minutes, take one ball at a time and using a rolling pin roll it out into a circle about 1/2 inch in thickness. Very lightly flour the surface if your dough is sticking. It shouldn’t stick, but sometimes on rare occasions it does.
- Once your roll it out, take the top end and fold it downwards so that the seam comes to the center. Pinch it in. Now fold the bottom end upwards so that the seam touches the center and pinch again. It will look like an envelope.
- Now turn the dough 90° so that the seam is a straight line and gently start rolling the dough from top down. Pinch the seam and place the dough into the prepared loaf pan.
- Repeat with the other two pieces.
- Let the dough proof till it fills 80-90% of the pan. Meanwhile preheat your oven to 190°C
- Once proofed, bake your loaf for 30 minutes. If your loaf is browning too much then tent it with foil. I personally like a brown coloured loaf so I have never covered it with foil.
- Remove the bread from the pan 5 minutes after removing it from the oven. Let it cool, enjoy!
100% Whole Wheat Japanese Milk Bread
Healthy, easy and delicious 100% Whole Wheat Japanese Milk bread recipe.
Tanghzong:
- 26 g whole wheat flour ((6.45%))
- 132 g water ((32.25%))
Bread:
- 385 g Flour (320 g whole wheat flour + 65 g Vital wheat gluten) ((93.35%))
- 60 ml Molasses ((14.6%))
- 8 g Salt ((1.93%))
- 7 g Yeast (active dry) ((1.6%))
- 190 ml Milk ((46.3%))
- 33 g Condensed milk ((8.06%))
- 33 g Unsalted Butter ((8.06%))
The day before
- Make the tangzhong:
- In a heavy bottom saucepan, take 26g whole wheat flour and 132 g water, mix till there are no lumps.
- Put on medium heat and whisk constantly for 2-3 minutes till the mixture is almost bubbling and very thick and stretchy.
- Place in a heat safe container and refrigerate overnight or at least 6 hours.
- Take a bowl, add the remaining whole wheat flour + vital wheat gluten, add the milk (180 ml, leave 10 ml for the next day for activating the yeasmix till the water is absorbed by the flour. The mixture will be quite dry, it’s okay. Cover with plastic wrap and leave in the fridge overnight.
Make the bread:
- In a large bowl (if using a stand mixer, use the bowl of your stand mixeadd the remaining room temperature milk, molasses and yeast. Mix and let it sit for 5 minutes till the mixture is foamy and smells like yeast.
- Add the flour+water mixture (room temperaturand tangzhong (I used it cold because the temperature in my kitchen was 36°C)
- Start kneading on a low speed. If by hand, gently start incorporating the dough. Knead for 2-4 minutes till a dough ball forms.
- Only once this happens add the salt. Knead again for 2-4 minutes.
- Now add the condensed milk and room temperature butter (I purposely used colder butter to balance the heat of my kitchen)
- Keep kneading till your dough is elastic. Check your dough’s strength by doing the window pane test. (If you have read the entire post you will know what this is, if not kindly read the entire posIn case your is too dry add 1 tablespoon of water. Do not add too much water beware.
- Once the dough passes the windowpane test. Roll it into a smooth ball and place it in a slightly greased bowl to ferment. It took my dough approximately 40 minutes to ferment perfectly (to know how to determine if you have proofed your dough enough please read the entire blog post above.)
- Once proofed. Prepare your loaf pan. I line my pan with parchment paper. Take your dough and divide into three equal pieces.
- Roll each of these pieces into smooth balls, place them on a clean surface and let them rest for 10 minutes. Cover them with a damp tea towel so that they don’t dry out.
- After ten minutes, take one ball at a time and using a rolling pin roll it out into a circle about 1/2 inch in thickness. Very lightly flour the surface if your dough is sticking. It shouldn’t stick, but sometimes on rare occasions it does.
- Once your roll it out, take the top end and fold it downwards so that the seam comes to the center. Pinch it in. Now fold the bottom end upwards so that the seam touches the center and pinch again. It will look like an envelope.
- Now turn the dough 90° so that the seam is a straight line and gently start rolling the dough from top down. Pinch the seam and place the dough into the prepared loaf pan.
- Repeat with the other two pieces.
- Let the dough proof till it fills 80-90% of the pan. Meanwhile preheat your oven to 190°C
- Once proofed, bake your loaf for 30 minutes. If your loaf is browning too much then tent it with foil. I personally like a brown coloured loaf so I have never covered it with foil.
- Remove the bread from the pan 5 minutes after removing it from the oven. Let it cool, enjoy!

Leave a Reply