The beginner’s guide to macarons with step by step guidelines. Yes, why would I call this post that? Because I am no chef and I by no means am an expert in macaron making. But as I said before, I have made my fair share of disappointing macarons. So, what makes a perfect macaron? A correctly made macaron is essentially identified by: (These are just my observations)
- crisp exterior and chewy interior
- the shell is not hollow
- smooth top of the shell
- the classic feet or ruffles.
Now, often times when we make macarons and fail, these may be the results we get:
- Extremely flat shell without feet/ruffles
- Cracked shell
- Perfectly domed shell without feet
- Macarons that develop feet hallway during the baking but collapse by the end
- Hollow shells
- Macarons sticking to the sheet
I have read many articles and blog posts about all these issues and more, how to troubleshoot them. I will definitely say that they are helpful, if you’re a baking nerd, yes. But if you are someone who is just interested in making macarons once a year for some occasion, why would you spend so much time reading and researching? Hence, I tried and tested various techniques and have found that this method works for me always. I must’ve made macarons at least 6-8 times before deciding that this is the method that works for me.
However, some extremely important aspects to making a recipe work for you, especially when it’s for something as tricky as macarons, you need to keep a few things in mind that your geographical location and quality of ingredients etc. matter way more than you think. A few things to keep in mind about my kitchen and the ingredients I use:
- I live in Ahmedabad, it is an extremely dry place. The humidity is extremely low (relative humidity during the summer months are below 40%)
- A kitchen scale to measure my ingredients ALWAYS
- I make my own almond flour (these are the almonds I use)
- I sift my almond and sugar mixture
- I always use an oven thermometer
- Parchment paper is what works for me more than a silicone macaron mat
- I use a hand blender to whip the egg whites and a silicone spatula to fold in the almond and sugar mixture. I have also used a Kitchenaid.
- Always use room temperature egg whites.
- Only use either powdered or gel food colour. I have always used these gel colours.
You can buy all the products I use, here: Click to buy.
Now, a standard recipe for macarons that I use is:
For the macaron shells:
55 g egg whites
25 g castor sugar
60 g icing sugar
55 g almond flour
A little less than ¼ tsp salt
1 tsp vanilla extract
For the filling:
100 ml heavy cream
120 g chopped Belgian chocolate
These steps are exactly what I do, I have tried to write as clearly as possible:
- To make your almond flour: Measure out your whole raw almonds and icing sugar and pulse them in a food processor until finely ground. Do not rush this step and do not over blend this mixture or else you will end up with sweetened almond butter.
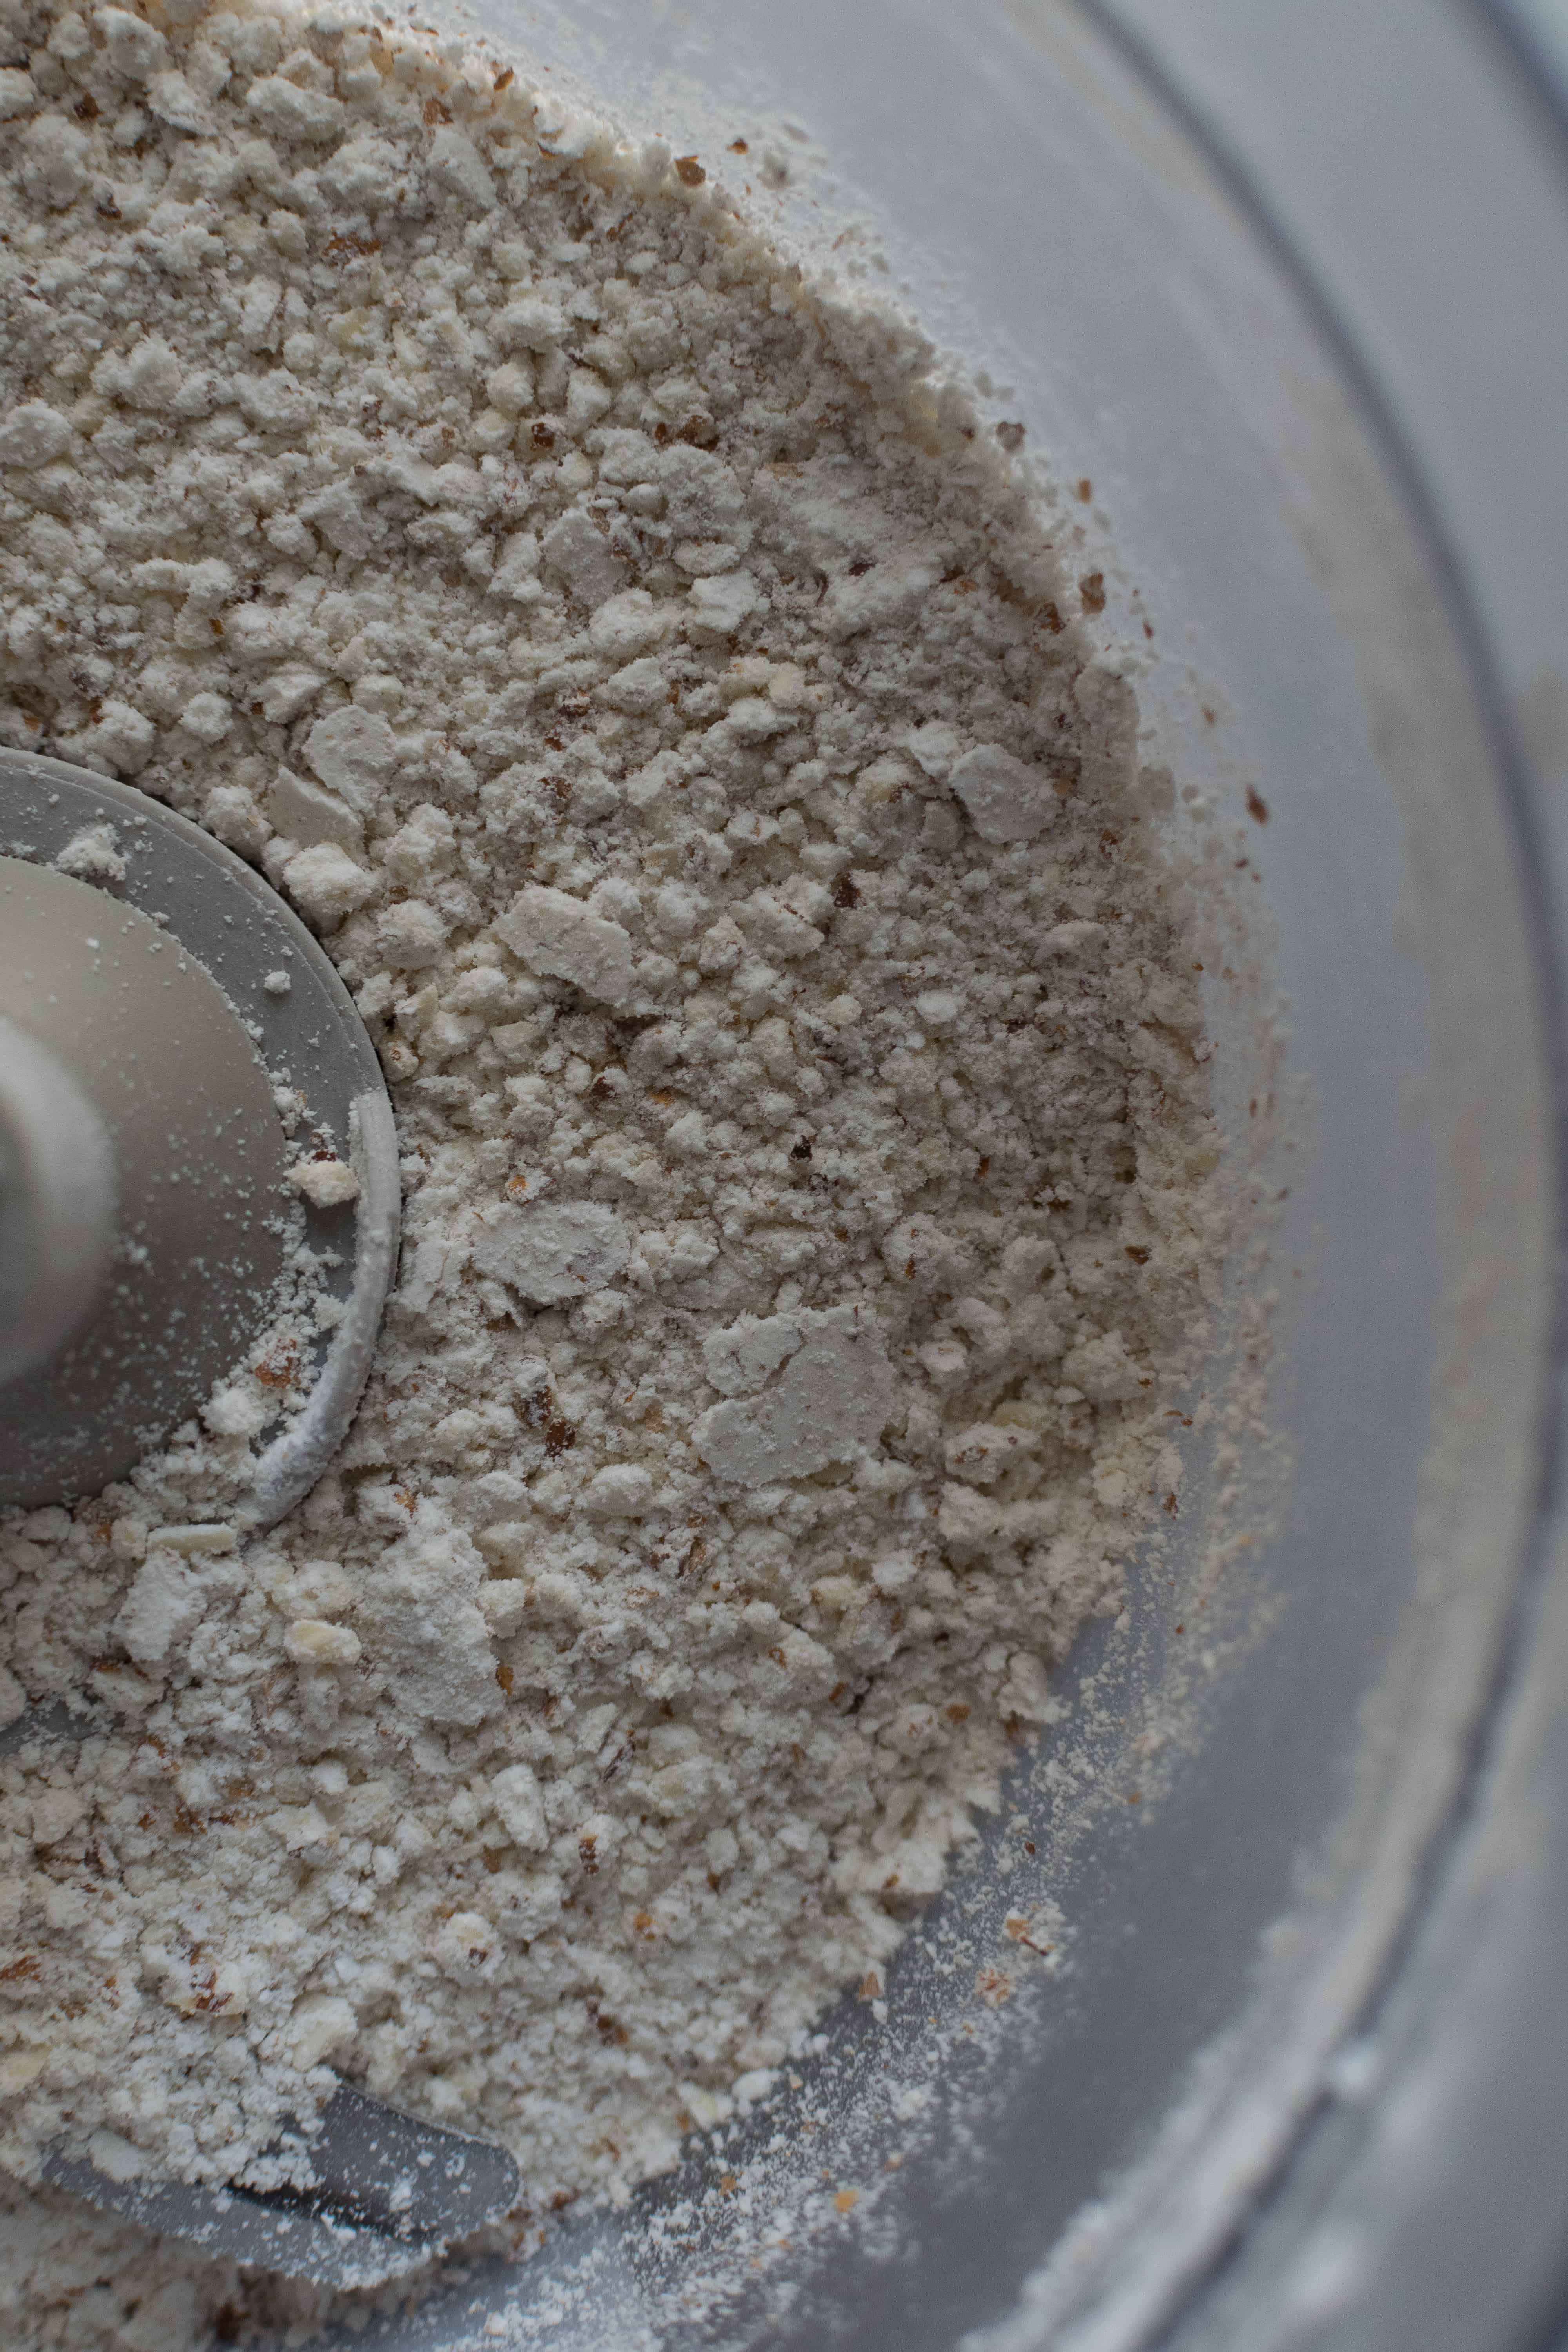
- Once your mixture is ready, sift it in a large bowl and keep aside. If there is a 1 tsp mixture left in your sieve, that is okay, discard it.
- Take a large bowl, make sure it is clean and dry and free of grease. To ensure that it is free of grease, take a kitchen towel or a tissue, soak it in a little vinegar and rub the bowl and the beater attachments.
- Now add the measured egg whites and the pinch of salt into the bowl. Measure the castor sugar and keep ready.
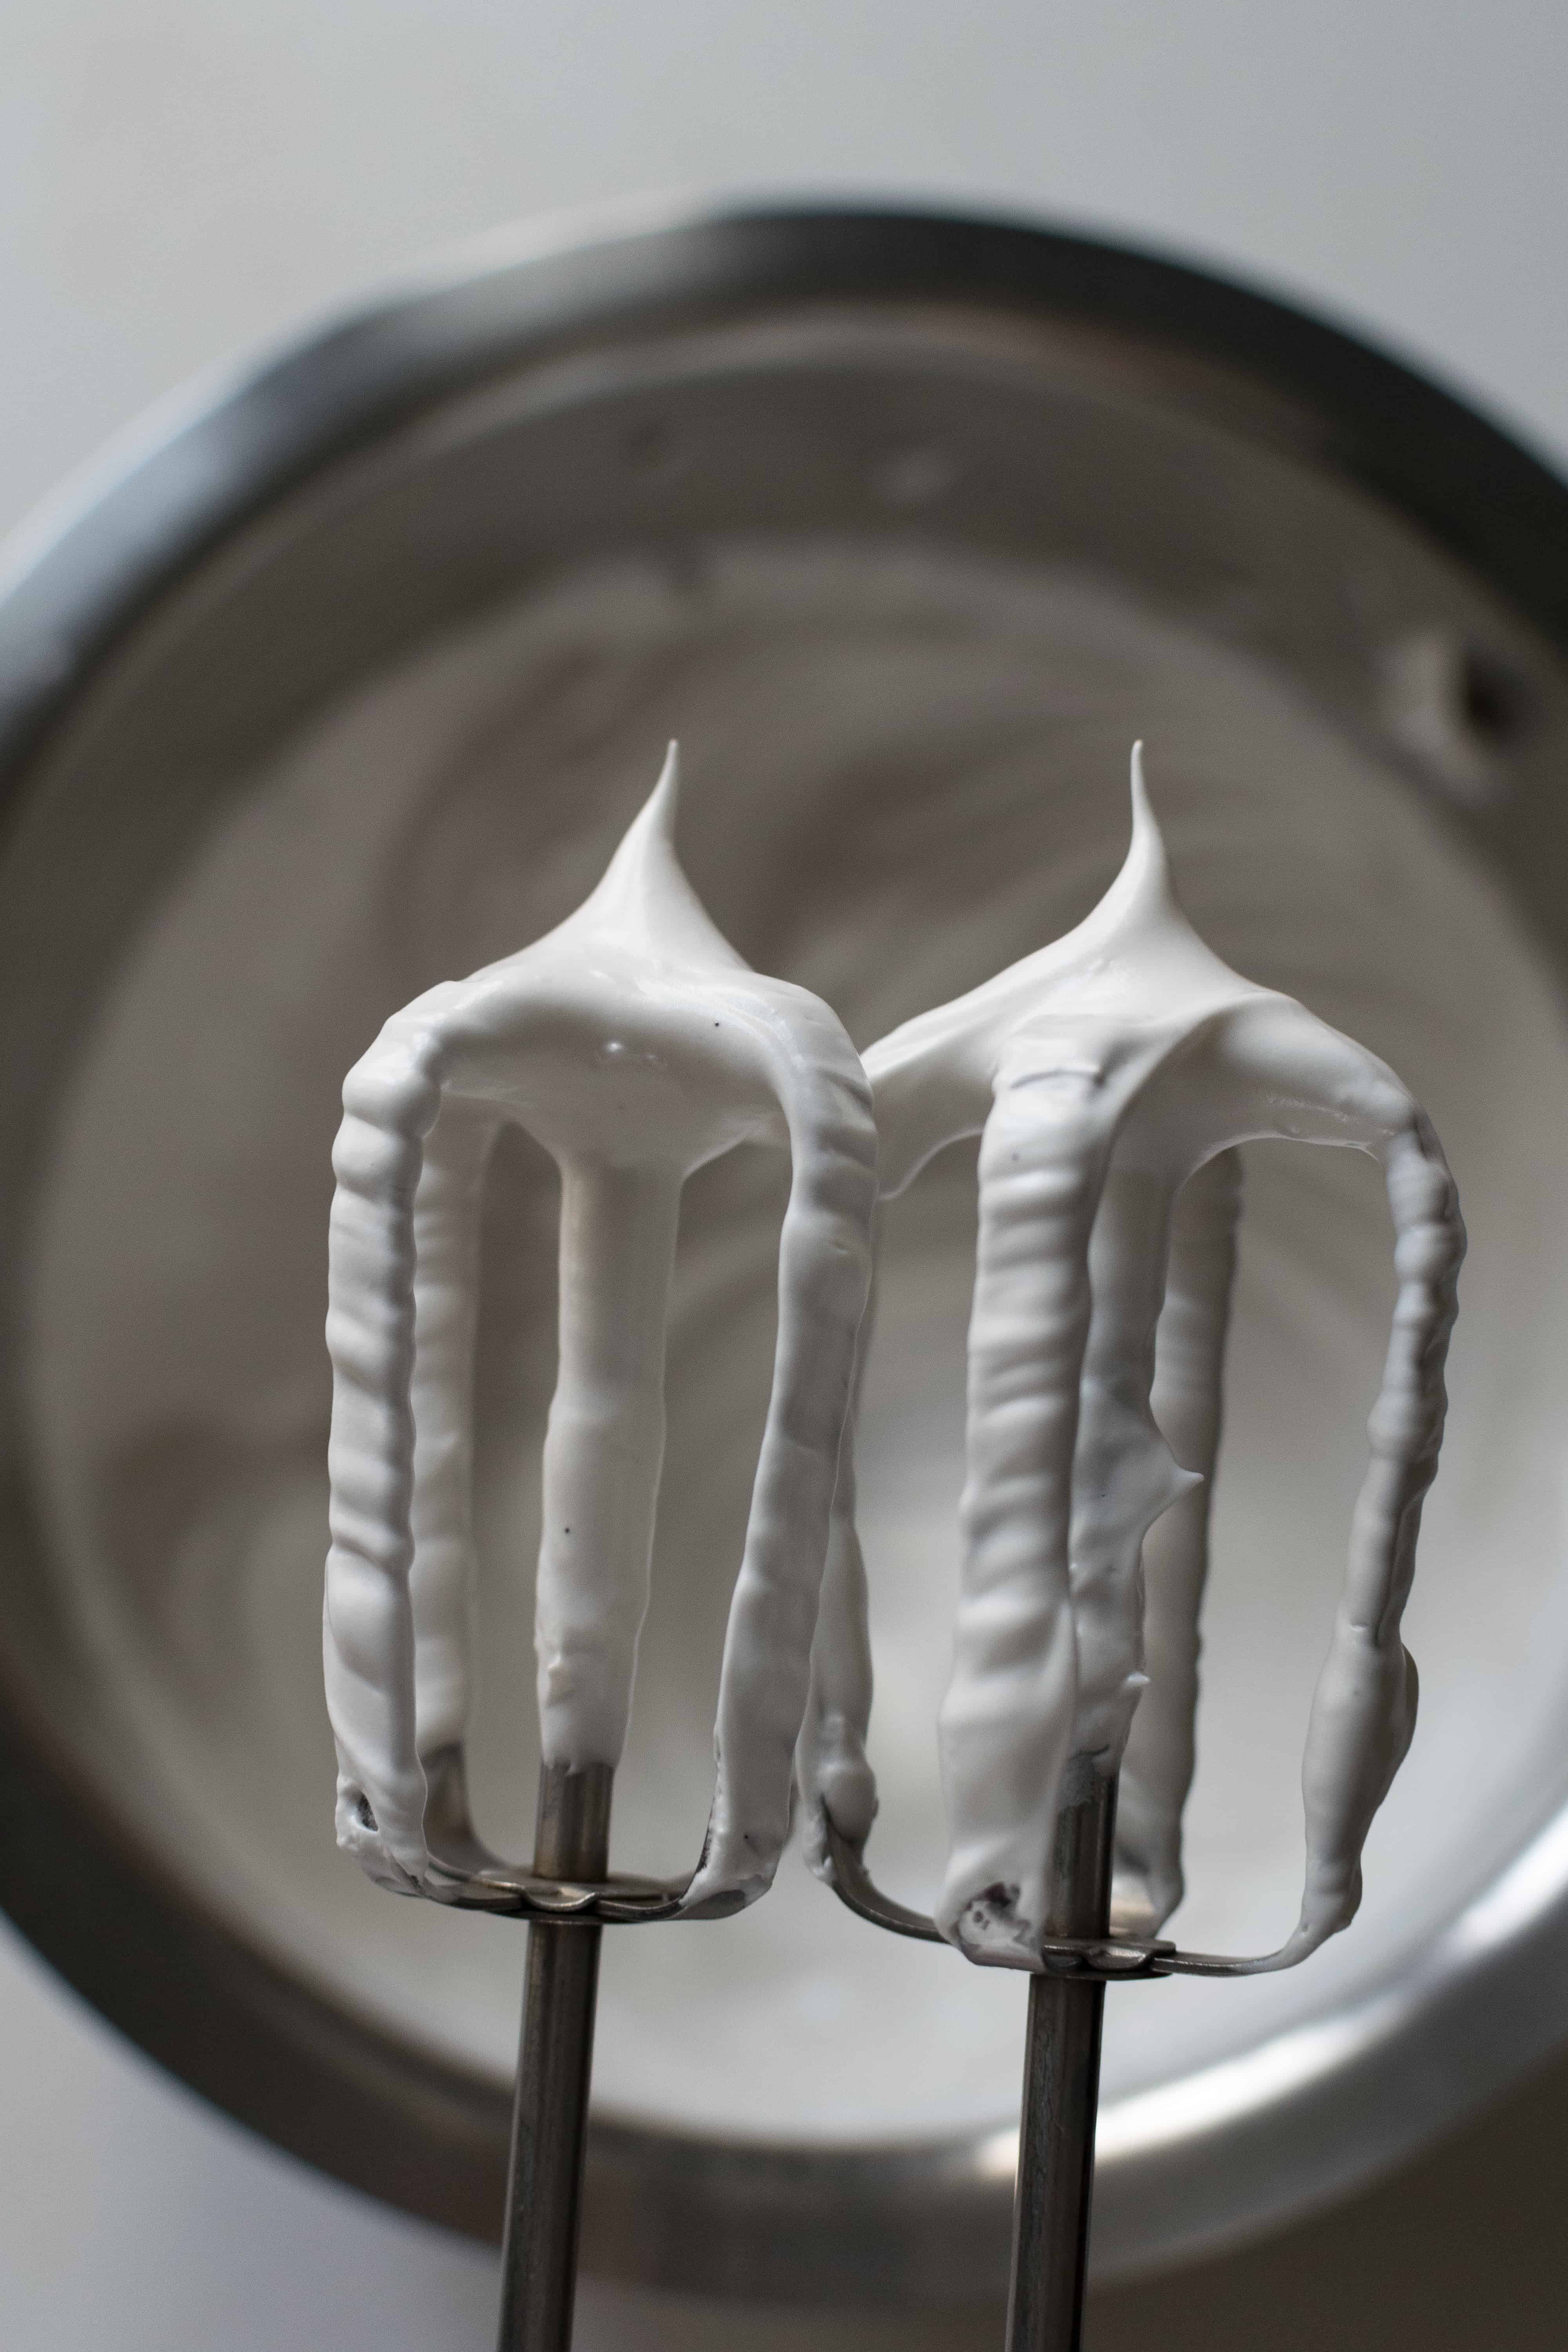
- Start beating the egg whites at low speed, when it gets frothy like soap, slowly start adding the sugar little by little. Keep beating continuously and once all the sugar is mixed, increase the speed and keep beating for around a total of 5 minutes then check by stopping the beater and lifting some of the mixture up. You are looking for almost stiff peak.
- Once that stage is reached you can add the vanilla and the food colouring if using and beat for roughly 1-2 minutes on high. You need to reach this stage as shown in the image. If you lift some of the mixture the should not droop, the peak should stand straight. This is it, do not beat any further.
- Now, add 1/3rd of the almond and icing sugar mixture and start folding gently. Go around the bowl and across the mixture. Once the mixture is almost incorporated add the next third of the almond and icing sugar mixture and follow the same folding pattern. Then add the in the remaining third of the mixture. Keep folding gently until you reach the texture as shown in the video. Once the batter becomes loose enough, flows continuously so that you can draw an ‘8’ mix no further. It Is important not to mix further.
- Now, transfer this batter into piping bags, you may use a small piping tip, I do not use one.
- You can use a macaron template, I do not use one. I just line baking sheets with parchment paper (not wax paper). Before putting the parchment take some of the batter remaining in the bowl and dab it in the corners so that the parchment paper can stick to the baking sheets.
- Now, leaving about 1-inch space between the macarons, pipe the macarons. Pipe the macarons about 3-5 centimeters wide. Once you finish piping, tap the baking sheet on your counter 3-4 times. The shells should even out on their own. They will not have any peaks.
- Now leave the baking sheets in the driest place in your house that is dust free. Let them dry out completely, it takes around 15 minutes to 1 hour or maybe even more depending upon the humidity of your kitchen. *IMPORTANT* it is important to let your shells dry completely. You cannot skip this step. The shells should be dry to touch, they will not stick to your hands when you touch them.
- Preheat your oven to 150 C and bake the dried shells for 12-16 minutes. Depending on your oven, how crowded the macarons are and the size of your macarons the time will vary. To check if your macarons are done, they will have the feet and when you gently touch their tops they will not be unstable.
- Once done, let the macarons cool on the baking sheet before you remove them and fill them. To see how to make the filling and how I assembled the macarons click here.
